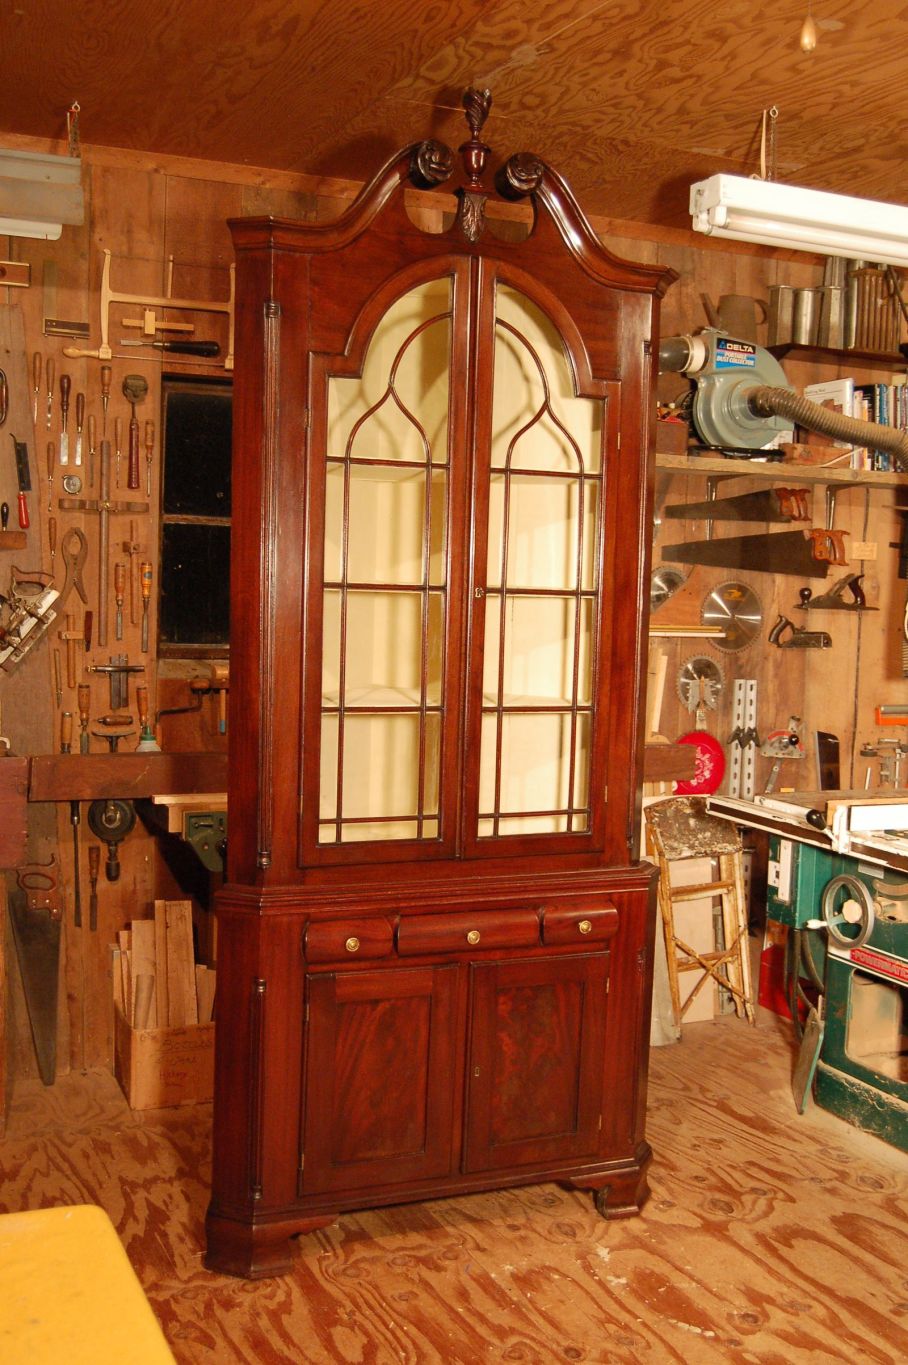
The Mystery Corner Cupboard – Chapter 8

Soon I began repairs to the doors. The glass appeared to be original – amazing. Much glazing was missing, but I restored it. With other minor repairs, the doors were strong and ready for finish restoration.

Glazed door

Door with missing glazing

Door with missing glazing

Before beginning the exterior finish restoration, considerable thought and study went into deciding the best course for restoring the cabinet interiors.  I found that the near-black finish wasn’t original, that the original was a warm buttermilk color milk paint.  Apparently, only the inside of the top cabinet was painted originally.

Layers of paint inside top cabinet

Layers of paint inside top cabinet

Top cabinet

Top cabinet 2

Later, along with the top, the bottom cabinet also got the near black treatment. The near black finish appears to have been a varnish glaze, which presented problems for over coating. There had only been 3 finishes, so stripping was unnecessary. The glaze also ruled out re coating it with milk paint. The conservator’s goal of reversibility led to finishing with latex paint – reversible, good adhesion to previous finishes – and a good visual match for the milk paint. I matched the original color and sheen. Once repainted, the interior color nicely complimented the warm mahogany exterior.

Exterior Finish Restoration

Restoring the exterior finish began with the base cabinet. The considerable repairs required a good bit of touch up, but the finish wasn’t fire-damaged, so it mainly required only cleaning, touch up, and a coat of linseed oil.

The veneered mahogany doors though, had severe alligatoring which required a re-bonding coat of wood alcohol, followed by vigorous restorative hand-rubbing with amalgamator. A coat of linseed oil put it over the top to happy. That is, the gorgeous figured mahogany was able to shine through again.

Base Cabinet

It was time at last to begin restoring the exterior finish of the top case, some of which had the most fire damage.

Pebbled finish

The severe “pebbling” of the original shellac finish, combined with areas of cracked or alligatored finish, while other areas were perfectly smooth, had me stumped. Further, it was worse on the carvings and moldings – the hardest to restore. I sought counsel from several experienced craftsmen, including some of the best in the field. Most had suggestions, but none were sure. I’d have to just dive in.

I tried several things but none were extreme enough, with sufficient controllability. When I tried sanding a small, obscure area with 400, then 320 grit finishing sandpaper, I found it tamed the pebbling without removing too much color or patina. With a careful touch – it worked. Combined with a couple of other steps using a mix of techniques and materials, taking care to only bring it back appropriately for its age, as though it had always been well cared for, the finish was gloriously restored. It was thrilling to see it come back to life.

Last of all was to restore the finish on the two glass doors. Here the fire-caused pebbling was particularly extensive, but I knew what to do and kept at it until they were done.

All that remained was to put everything back together, make sure doors and drawer worked properly, locks worked, etc. Once back together, it was one of the most elegant, visually impressive pieces I’d ever seen. To see such a stunning transformation was a highlight of my career.

CrownCrown restored

Top before

Top after

Complete and restored.

Complete and restored.

The Mystery Corner Cupboard – Chapter 7

Now that the lower case was structurally sound, it was time to restore the doors. The two mortise and tenon door frames were made of solid (heavy and hard) Santo Domingo mahogany – the best. Still, their faces were veneered,some of which was loose.  This I reglued while also making a survey of loose areas of veneer in the panels.

DoorDoor2Thinned hide glue was carefully worked into the loose areas, then the panel, glue and veneer was clamped flat.  Happily, it came out flat as new.  The process was                                                                           repeated on the second doDoor4or.

Door3Door6Door7Door5

Door8

Also on the right door, about 2″ of the quarter round molded edge was split-off and missing.  I flattened the area with a chisel,

Door10

Door9Door11Door12

grafted on a piece of matching Santo Domingo mahogany, shaped it down, then matched color and finish.  Finally, I took care of a last minor veneer repair.

Door13Door14With repairs to the lower case and its parts completed, I turned my efforts to the upper case.  It was happily in much better shape than the base.  What repairs there were, were minor and not widespread.  There was minimal case regluing, minor repairs where the cases joined, some loose or missing veneer, etc.  Looming ahead, that fire-damaged finish.

Case

Case2

Junction of case to base

Case3

Case4

Fire damaged finish

The Mystery Corner Cupboard – Chapter 6

      Now that there were feet to stand on, it was time to see to the soundness of the base. On the front, the mahogany skirt molding was loose, as was the thick mahogany veneer it was attached to. I reglued it first with hide glue, as it was originally, then reglued the molding.

Skirt molding

Skirt molding 2

     The thick, loose mahogany veneer on the lower front and right side was next.

Veneer repair

     It was an extra challenge because there was some thick, dried Elmer’s Glue-All under the veneer that had to be removed first. I got the wrong glue out, got the right glue in, clamped it flat, and it was good to go for the next generations.

Veneer repair

Clamping veneer

Veneer repair 2

Veneer repaired

The Mystery Corner Cupboard – Chapter 5 – Adventure of Restoration Continued


Now that the right foot was structurally sound, it was time to restore the 2-part mahogany bracket foot face. The left half (front facing) was basically sound and intact. The right side, though, had lost the lower 1/5 to decay.

Bracket foot

The owner had, years ago, built up most of the missing part with window glazing compound and done a passable job shaping and coloring it. I elected to stabilize the rotted parts, and keep her repair (after all, it was part of its history) but to build it up or trim it as needed to refine its shape. The last step was to bring the color up and make that putty look like old mahogany.

On the top, cove-molded edge, I repaired a couple of split-open nail holes; the original nails had completely rusted away.

Bracket foot2

For nails to completely rust away, and for mahogany to rot like this, proves this piece was in a very damp/wet area a very long time. Why? Because this type of mahogany is almost impervious to water. Boats are made of it.

Now that the right bracket face was restored, it was time to re-fasten the faces to the foot structure. They matched up everywhere but on the bottom. A quarter inch on the bottom right must have rotted away.

Bracket foot 3

Bracket foot4

It could have been faked (I was ready to be done with this foot and move on to something else), but it wouldn’t have been right. I found a mahogany scrap with matching grain and color and “grafted” it on,

Bracket foot5

then shaped it down. This time it matched well. I fastened it on.

Bracket foot6

The left foot required only minor repairs. I made them and did fine touches – light shimming of minor gaps between bracket faces and substrates. At last the feet were restored.

Left foot Left foot2

Left foot3

The Mystery Corner Cupboard – Chapter 4 – Adventure of Restoration

Adventure of Restoration

I decided to work from the bottom, up. After all, one needs to have something stable to set the top section on while working on it.

First, I restored the feet. The back foot was largely rotted off.

Back foot

This is the original 2 piece foot found in a drawer.

It was made up of two back boards nailed to the frame, ending in a simple foot, backed up by an infill made up of 2 shop scrap pieces nailed together. For the restored foot to have full strength, the entire two back boards needed to be replaced. Providentially, I had on hand an amazingly similar board – old-growth poplar, same thickness, hand plane marks, and large enough to replace the two boards.

Even a slight bow was identical. I let the original edge be the one that shows, and also used antique hand-wrought nails from my supplies which were just like the originals.

Back2

Back3

Back4

Back5

The right front foot also had considerable moisture-caused decay. It was made up of a white pine front and side board substrate nailed together, backed with a solid infill of poplar. Its 2-part mahogany bracket foot was 20% reduced on its right side due to decay. This decay also extended to part of the substrate boards which fastened to and helped make up the right foot.

Front

Front2

Front3

Front4

I determined it was best to save the rotted base of the white pine substrate by turning the soft decayed wood back to being hard and strong, then building up the missing areas to their original dimensions with 2-part epoxy. I found that flooding decay-softened areas with different strengths (“cuts”) of shellac performed admirably – without the toxic fumes of other methods.

After stabilizing and strengthening the wood, the new poplar infill was made and fastened in.

Front5

Front6

 2-part epoxy was mixed up, building up rot-diminished areas and then shaped down to original dimensions.
Front8

Front7

The Mystery Corner Cupboard – Chapter 2

The piece was made up of 2 cabinets, one on top of the other. The top case had shelves and 2 glass doors (which hinted at refinement). The bottom cabinet had one working drawer plus 2 faux drawers, and 2 doors.

This shows how dark the finish was

This shows how dark the finish was

The base cabinet appeared to have sat in a wet location a long time. Visually, not only was the once bright clear mahogany finish dark and lifeless, there was obvious veneer damage overall, with large areas loose and wavy on the lower face and sides.

The characteristic Philadelphia bottom doors of highly figured mahogany veneer were also lifeless, with large surface “bubbles” of loose veneer.

The whole piece sat a little cockeyed, as 2 of the 3 feet had experienced considerable rotting from damp conditions (the laborer’s cabin?).

DSC_0444 Upside down bottomBottomThough in rough condition, it didn’t seem to show more than moderate age (100-150 years). That is, the damage seemed more from neglect than wear. Later this seemed explained by the fact that it was a formal type of furniture, for use only around Thanksgiving, Christmas and Easter.

As I examined the piece more closely, on the back I saw that what at first appeared to be water-powered sawmill marks were in fact evidence of pit sawing, which placed it farther back in time, even the late1700’s.

First look - water-powered sawmill?

First look – water-powered sawmill?

Pit sawing

Closer look – pit sawing pushed the date back

The Mystery Corner Cupboard

Philadelphia Chippendale Corner Cupboard of Mahogany

ca. 1790

Somewhere in the Philadelphia area, near the close of the Revolutionary War, in the heady early days of the United States of America, a cabinetmaker was commissioned to make a Mahogany corner cupboard in the style of Thomas Chippendale.

He was a master of the Chippendale style with its various distinguishing elements. The piece he produced not only looked to be in that style – it conveyed the very spirit of the ideal. It was an exceptional piece.

After its bloom years “in the latest style” it passed out of fashion, but continued serving with its well proportioned grace and obvious quality.

The passage of time in candle and kerosene lit homes, with wood and coal heat, tends to make things darker and dingier. To new generations unaware of family stories, even the finest heirloom can be dismissed as “creepy and old”. This fine piece was no exception. Eventually it moved from formal dining room to a migrant laborer’s cabin.

At some point in its history, there was a house fire in which the corner cupboard suffered serious heat damage to its finish, which only compounded its poor appearance. 

Meeting a mystery piece – just how old is it?

The top section - "Before"

The top section – “Before”

In the Spring of 2010, I received a call regarding some furniture needing restoration, including an old corner cupboard. I went to take a look.  When I first saw the corner cupboard, it was in the farthest corner of the basement, propped up on a piece of pressure-treated 4×4.  My first impression was that it was a poor reproduction from the 1850’s – not very impressive.  But there were surprises in store.

Welcome to the Golden Eagle Cabinet Shop log

Blog 1

Hi everybody, I’m Elijah Tabor, a cabinetmaker specializing in furniture restoration.  Check out goldeneaglerestoration.com for a sense of what I do, the unique approach I have to the art, and photos of several restorations.  It’s all about heart, uncompromising quality, and integrity.  It’s about keeping faith with the craftsmen who made the heirlooms we enjoy and value today, and the ones who passed them on to us.

I’m about to embark on the restoration of an 1880s Eastlake rocking chair.  It’s been in the same family for at least a few generations, and definitely needs help to regain its former glory.  Stay tuned for updates as the restoration unfolds.

I also have a high regard for and love of old tools, (as many of us do) and use them daily.  I may feature them from time to time.

In the future, there may be tours of this fascinating shop I’m so blessed to work in, or stories from my 40 plus years in the trade – maybe even a glimpse of our historic homestead.

Thanks for tuning in!